
Adobe Creative Cloud
Logging In to Adobe Creative Cloud (Video)
How To Access and Install Adobe Creative Cloud Applications (Text Guide)
All Creative School affiliates (students/faculty/staff) are subscribed to Adobe Creative Cloud application licenses automatically for use on their personal computers and school labs. Student access to the Adobe Creative Cloud License is limited to students enrolled in Creative School courses only.
Before You Begin:
- Existing Subscriptions or Trials: If you already have Adobe applications installed via a personal subscription or trial, sign out and sign back in using your TMU credentials. If issues persist, uninstall your existing Adobe apps before proceeding with the steps below.
- MFA Requirement: You must have Microsoft Multi-Factor Authentication (MFA) activated for your
@torontomu.caaccount. Click here for instructions on setting this up.
Step-by-Step Setup Guide
Step 1: Sign In to Adobe Creative Cloud
- Go to creativecloud.adobe.com and click Sign In in the top-right corner or main banner.

Step 2: Enter Your TMU Email
- Type your full TMU email address (
your_id@torontomu.ca). - Click Continue.
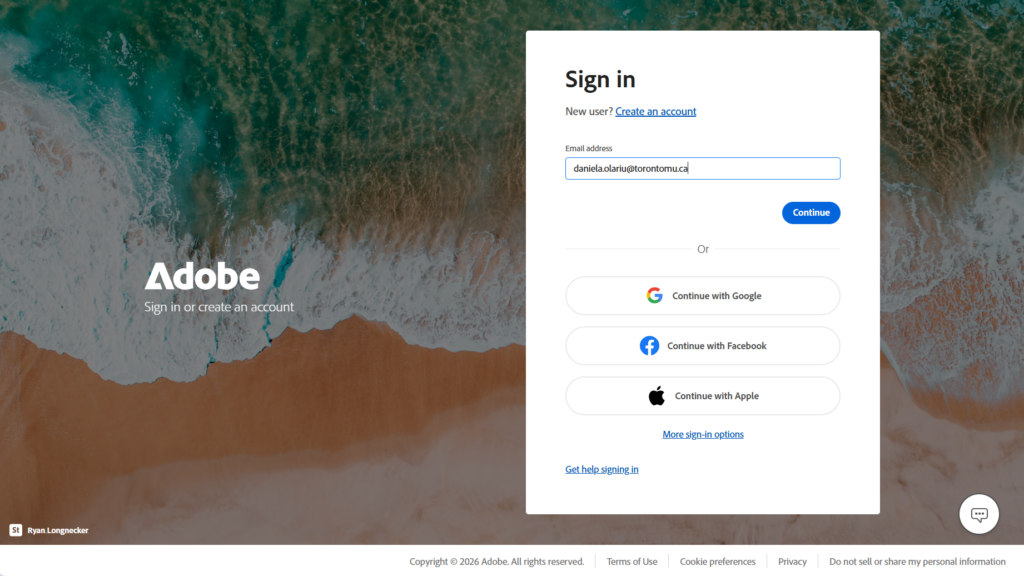
Step 3: Select Account Type
- If prompted, select Company or School Account.
Step 4: Password & MFA Authentication
- Enter your TMU password and click Sign In.
- Confirm or approve the prompt on your phone using your Microsoft MFA App.
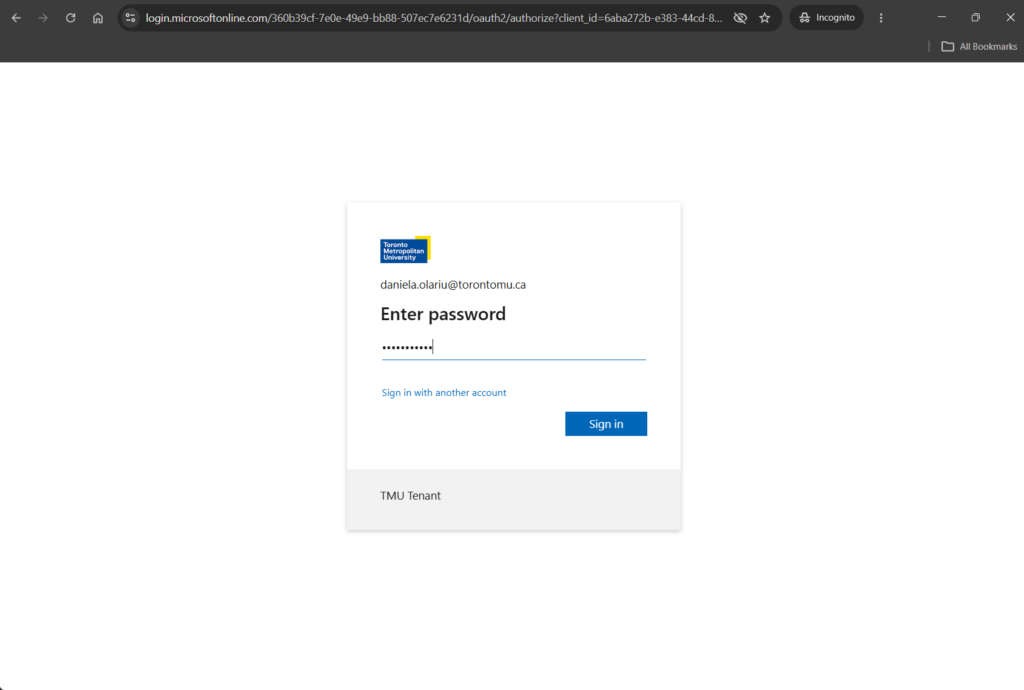
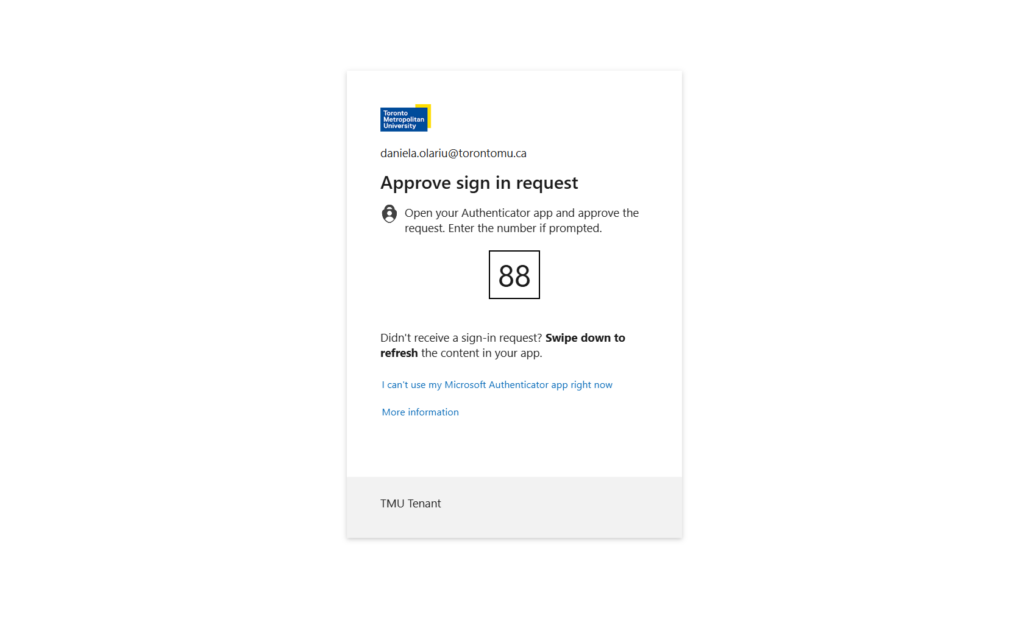
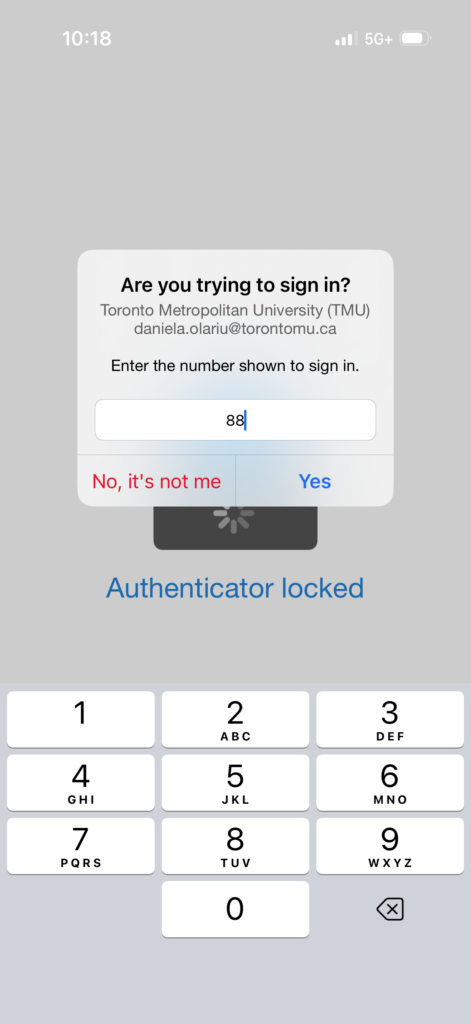
Step 5: Download or Install Apps
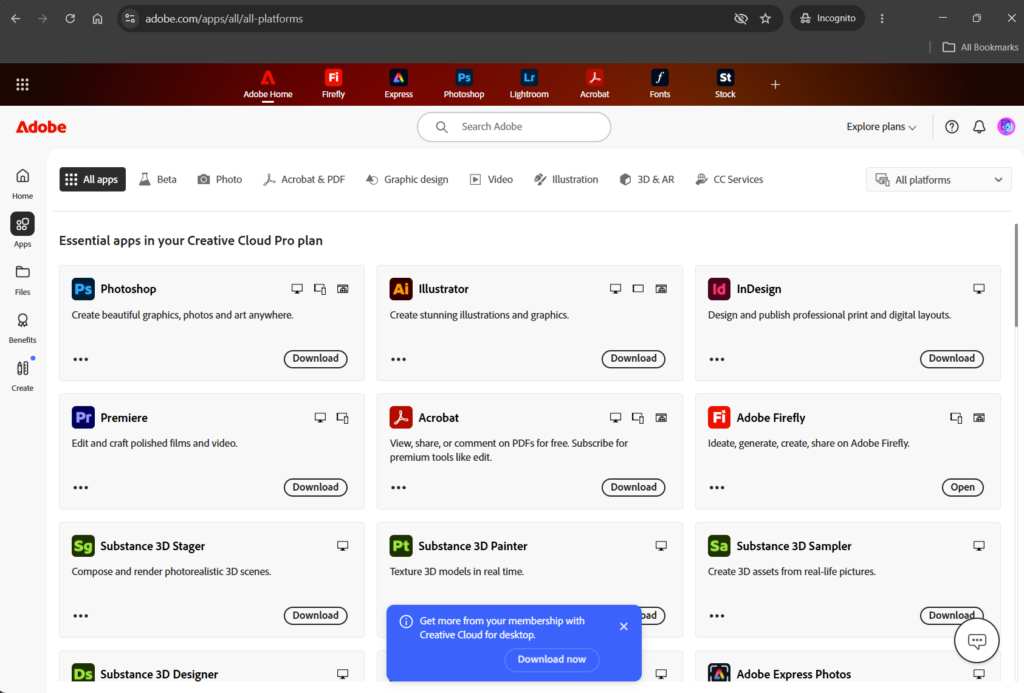
- Once logged in, click Apps on the left sidebar.
- Locate the Adobe Creative Suite application you need (e.g., Photoshop, Illustrator, Premiere Pro) and click Download or Install.
Important Notes & Eligibility
- Creative School Students: Your license remains active continuously until you graduate or become inactive due to non-enrolment.
- Non-Creative School Students: If you were granted access for taking a course in The Creative School during the Fall/Winter/Summer terms, your access expires automatically at the end of that specific term.
Graduating Students (Access Ends April 30th)
- License Termination: Access to Adobe CC licenses ends on April 30th upon graduation.
- Storage Reduction: Cloud storage drops from 100 GB to 2 GB.
- Data Loss Prevention: You have a 30-day grace period following April 30th to manually download and back up your files.
- Note: Adobe Automated Asset Migration is disabled by CCS—you must save your files locally yourself before the grace period ends to prevent permanent data loss.
Troubleshooting
“You don’t have access to this” Error Message
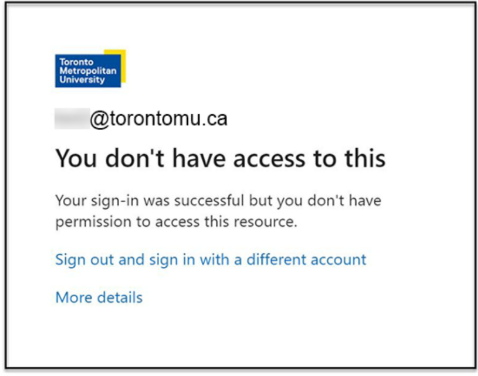
If you see this error message when logging in, you need to reactivate your Microsoft MFA account:
- Go to your my.torontomu.ca portal and click Personal Account under Self Service.
- Navigate to the Security section and select Microsoft Multi-Factor Authentication.
- Click Proceed to Microsoft MFA Setup to automatically reactivate your account.
- Still getting an error? Try using an incognito window, different browser or signing completely out of your Microsoft account and signing back in. If you have another Microsoft account associated with a different email, it will interfere with the set up of the TMU one.
Missing MFA Prompts / Lockout Issues/New Phone or Personal Device
- If you do not receive an MFA alert on your phone, get locked out, or get a new phone or personal device, Contact CCS (Computing and Communications Services) during working hours at help@torontomu.ca or 416-979-5000, ext. 556840 for students and 416-979-5000, ext. 556806 for faculty/staff. Have your Student/Employee number ready as they will verify your identity to reset your account.
- For licensing assistance if you are only seeing free trails, email production@torontomu.ca if you are a student and techhelp.creative@torontomu.ca if you are faculty/staff.
Enabling Adobe Fonts
Activate Adobe fonts to seamlessly integrate typefaces into your Creative Cloud applications for use across all your design projects.
To enable the font in your Adobe CC apps, complete the following steps:
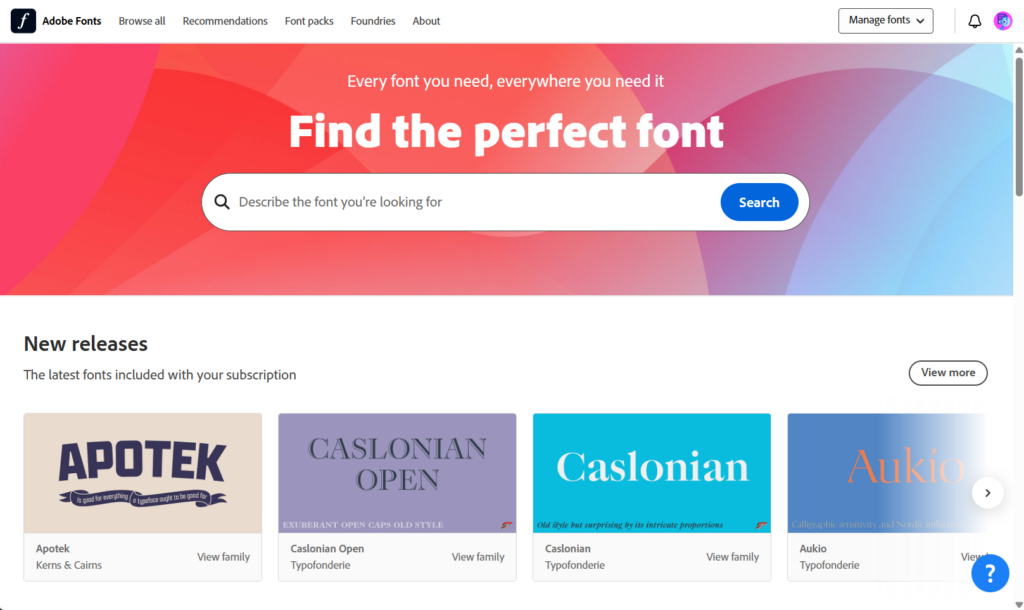
- Go to fonts.adobe.com to browse free and downloadable fonts.
- You will be prompted to log in. Sign in using your TMU email address and password.
- In the search field, enter the name of the font you’d like to add and select it from the dropdown.
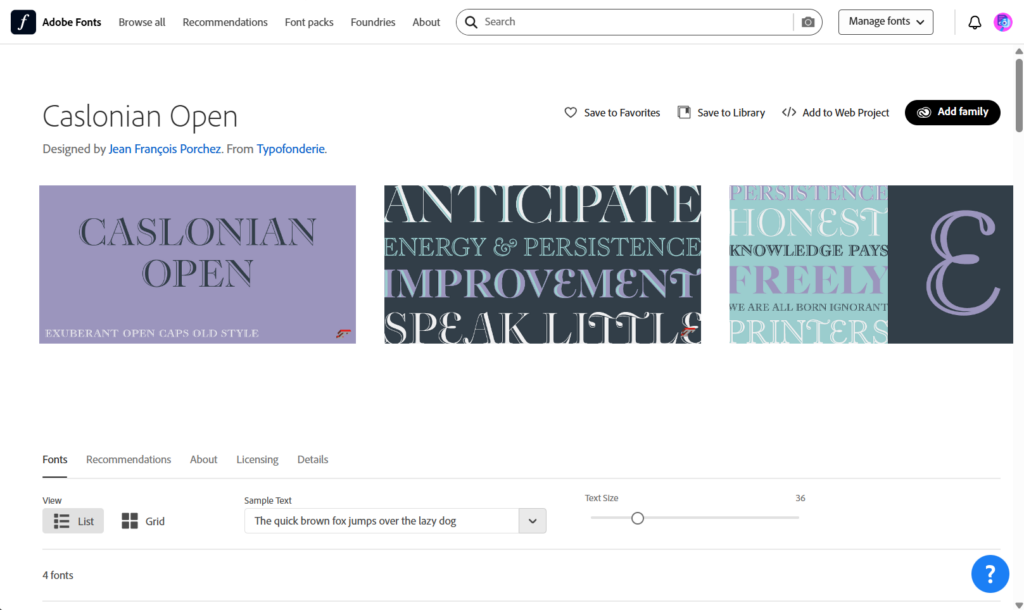
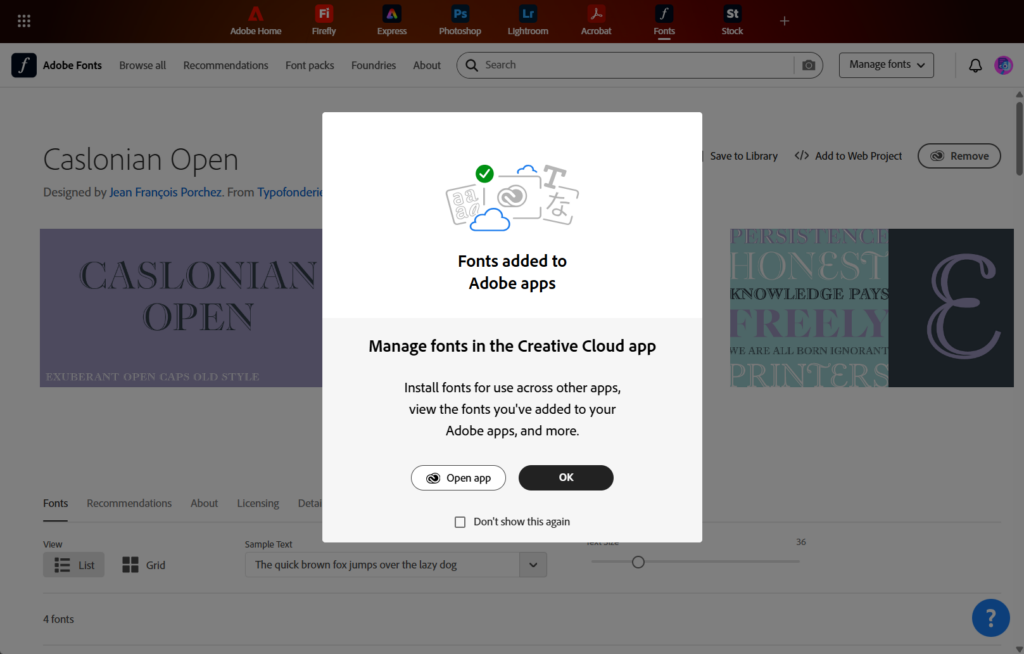
4. This will display a preview of the font family. Click on “Add Family.”
5. You will then get a popup window confirming the font family was added to your Adobe apps. The font family will now be accessible in all of your Adobe CC apps.
How to Install Previous Versions of Adobe Creative Suite Software
Learn how to locate and install legacy versions of Adobe Creative Cloud applications. This guide explains how to roll back or access specific software releases to match project requirements or system compatibility needs.
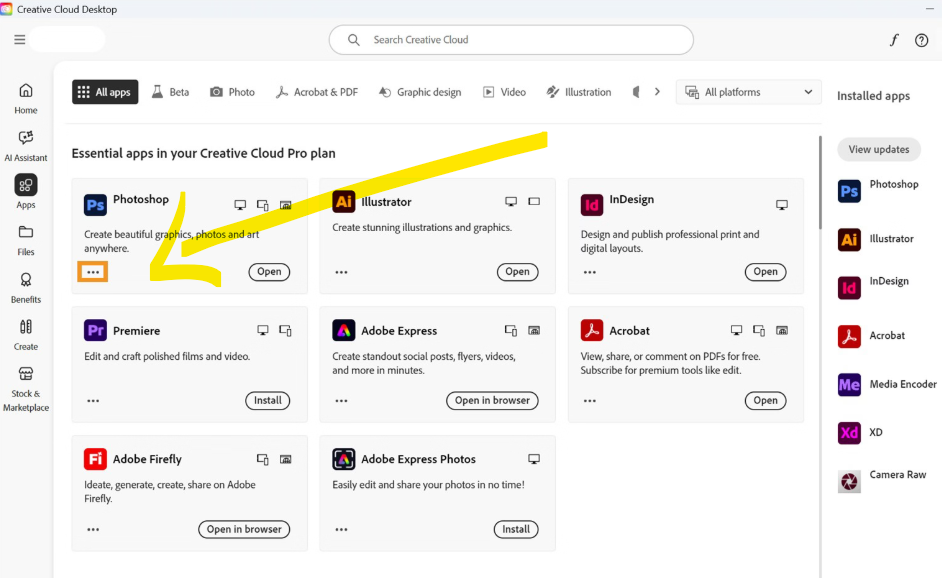
1. Open the Creative Cloud desktop app.
2. Select More actions (3 dots) for the app that you want to install.
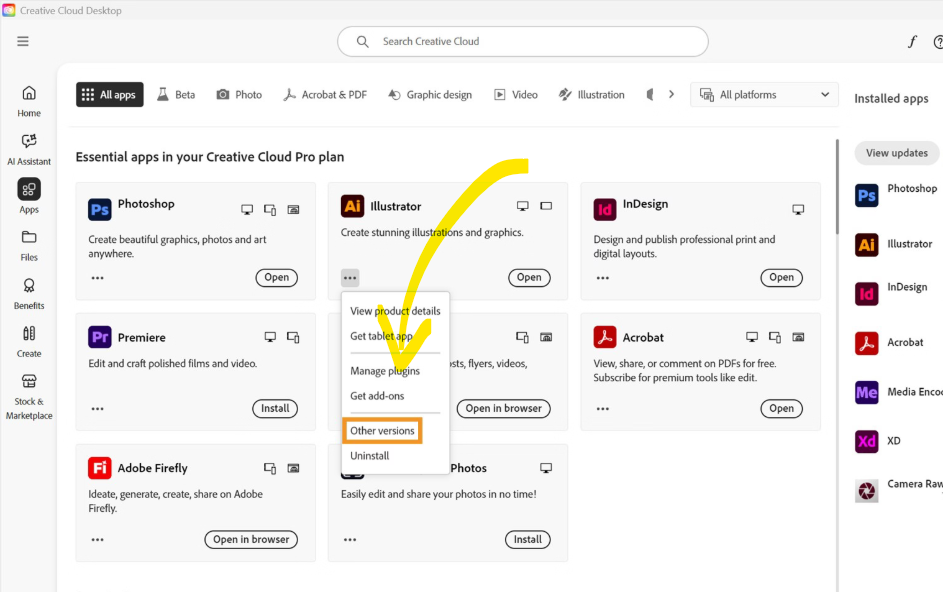
3. In the context menu, select Other versions.
4. Find the app version that you want to install, and select Install.
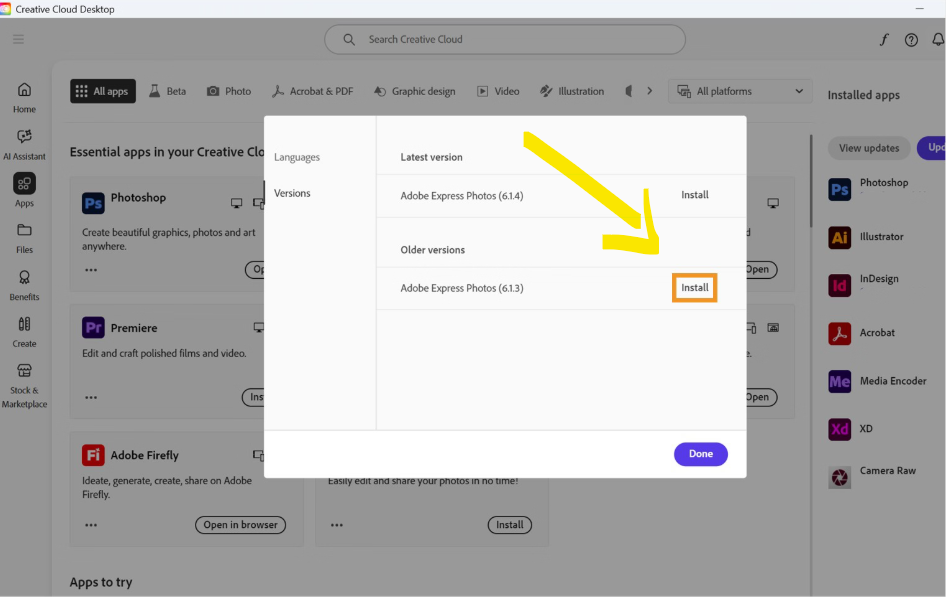
Your app’s preferred version will start installing.
Backing up & Exporting Assets in Adobe Creative Cloud
How to back up & export assets in Adobe Creative Cloud to keep your work safe and organized.
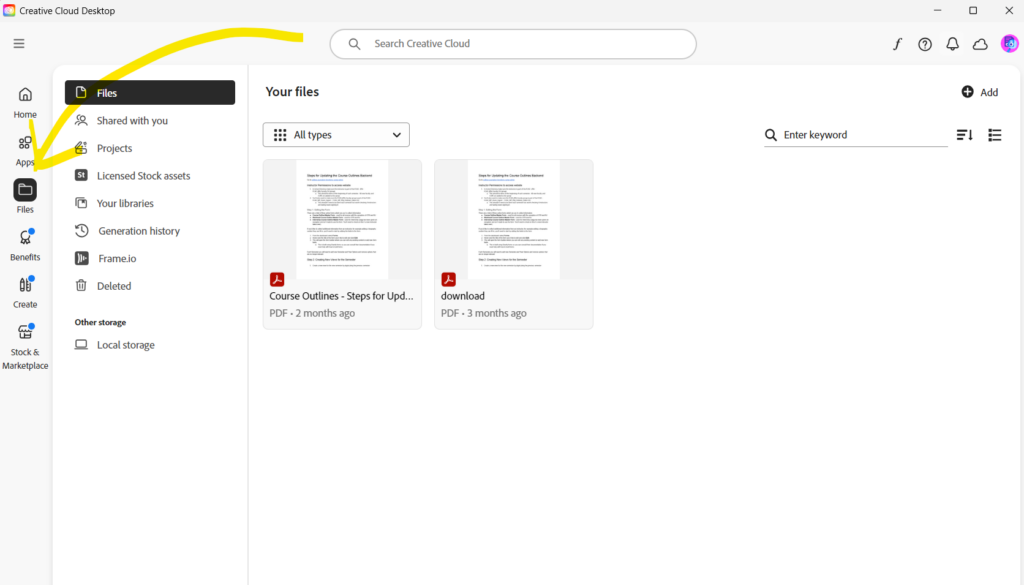
Locating Files in Adobe CC
- Open the Adobe CC Desktop Application.
- Select Files in the left tab bar.
Backing up Files or Adobe Libraries
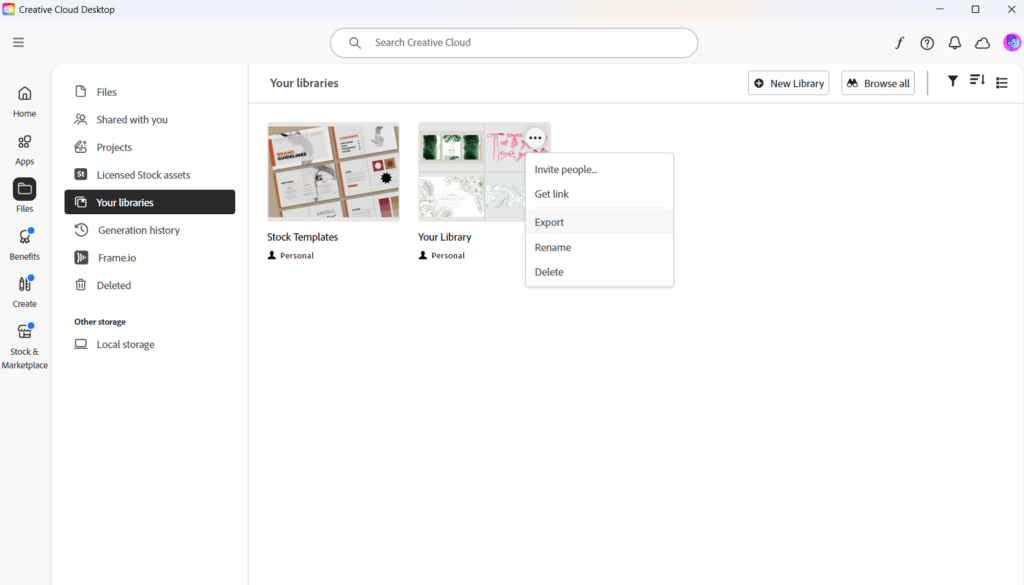
While in the “Files” tab of the Creative Cloud app, select the type of files you want to back up. In “Files” you should find any documents you have saved in your cloud. If you save to your desktop, they will not appear here. In “Your Libraries“ you should find any collections of assets from any Creative Cloud Apps you have saved.
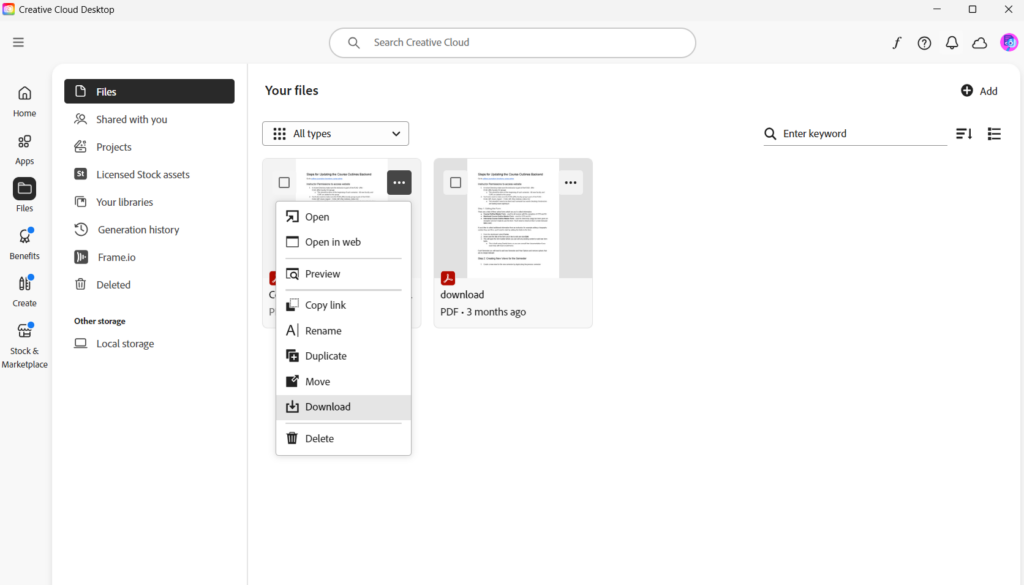
Save Files
- Right click and select Download.
- When prompted, select a location to Download to.
- Click Download.
Save Libraries
- Right click and select Export.
- When prompted, select a location to Export to.
- Click Export.
Importing Files
Importing files downloaded from the “your files” or “your libraries” section of Adobe Creative Cloud is as simple as dragging and dropping the files from your desktop or file browser (finder, file explorer) into the tab they were exported from.
On BeHance & Adobe Portfolio
Adobe Portfolio
It is possible to move adobe portfolio accounts from your school account to another specified account. If you are trying to migrate from your previous “@Ryerson.ca” school account to the new “@torontomu” account you may have to contact Adobe directly if the steps below do not work. Check this link for more information.
Adobe Behance
It is not currently possible to migrate an adobe Behance Account.